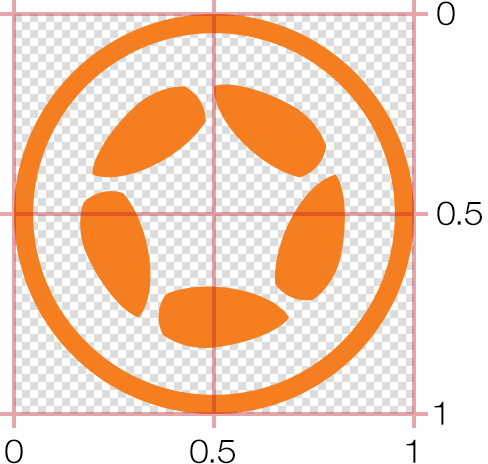
扩展锚点
在 Solar2D 中,所有显示对象都有一个锚点。本质上,这可以想象成对象边界内的一个“固定”点,所有变换都围绕该点发生 — x/y 定位、旋转、缩放等。例如,如果对象的锚点设置在
锚点概述

默认情况下,锚点通过对象属性 anchorX 和 anchorY 设置。它们的值通常是介于 0.0 和 1.0 之间的十进制值,其基本表示如下:
0.0表示顶部或左侧边缘。0.5(默认值)表示中心。1.0表示底部或右侧边缘。
当然,介于0.1、0.25、0.84 等)
例如,要将锚点设置在对象的0.0
local object = display.newRect( 150, 150, 100, 100 )

-- Set anchor to top-left
object.anchorX = 0
object.anchorY = 0

-- Transition the object to test anchor point
transition.to( object, { time=2000, rotation=45, delay=500 } )
(或简写为 0)1.0
local object = display.newRect( 150, 150, 100, 100 )

-- Set anchor to bottom-right
object.anchorX = 1
object.anchorY = 1

-- Transition the object to test anchor point
transition.to( object, { time=2000, rotation=45, delay=500 } )
(或简写为 1)
local object = display.newRect( 150, 150, 100, 100 )

object.anchorX = 0.25
object.anchorY = 0.25

-- Transition the object to test anchor point
transition.to( object, { time=2000, rotation=45, delay=500 } )
扩展锚点
锚点也可以设置为某个内部点,例如距离左边缘 25% 的位置。默认的“限定”值 0.0 到 1.0 适用于大多数使用情况,从对象外边缘上的任何点到对象内部的任何点 — 但是如果我们想将锚点设置到对象边界之外的某个理论点呢?
扩展锚点的第一步是禁用 display.setDefault() 的 "isAnchorClamped" 设置。
display.setDefault( "isAnchorClamped", false )
现在,设置为超出0.0–1.0
local object = display.newRect( 150, 150, 100, 100 )

object.anchorX = -1
object.anchorY = 1.5

-- Transition the object to test anchor point
transition.to( object, { time=2000, rotation=45, delay=500 } )
这种方法的一个具体应用示例是让一个物体围绕另一个物体旋转,就像行星绕太阳运行一样。如果锚点被限定在对象内部或边缘上的点,它只能以有限的视角旋转,但将 "isAnchorClamped" 设置为 false,我们可以轻松地使行星绕太阳运行。
display.setDefault( "isAnchorClamped", false )

local sun = display.newCircle( display.contentCenterX, display.contentCenterY, 24 )
sun:setFillColor( 1.0, 0.78, 0 )

local earth = display.newCircle( display.contentCenterX, display.contentCenterY, 6 )
earth:setFillColor( 0, 0.5, 0.7 )
earth.anchorX = -10.0

transition.to( earth, { time=8000, rotation=-360, iterations=0 } )
像素 vs. 范围
如上图所示,设置锚点是基于相对于对象边界的范围:0 是左上角,0.5 是中心,1 是右下角,等等。类似地,假设禁用了锚点限定,则值 2.0 将锚点从-0.5 将其向左上角延伸 50%。
这足够合乎逻辑,但是如果我们需要在对象内的特定像素点或其边界外的特定像素距离处设置锚点呢?例如,如果一个对象的大小为 86×90 像素,我们想将它的锚点设置在距离
12 像素的位置呢?
local object = display.newRect( 150, 150, 86, 90 )

object.anchorX = 12 / object.contentWidth   -- 0.13953488372093
object.anchorY = 12 / object.contentHeight  -- 0.133333333333333
通过一些基本的数学运算可以轻松完成此操作。只需将像素缩进量 (12) 除以示例对象的宽度 (86),将结果设置为对象的 anchorX 值。然后对 y 锚点执行相同的操作,将 12 除以 90,并将该值设置为 anchorY。

请注意,如果您将锚点扩展到对象边界之外,则可能需要考虑对象宽度的一半。例如,假设下面的橙色圆圈大小为 100×100 像素,并且您希望其锚点位于左侧远处(蓝线的末端),则正确的计算结果将是 -400/100,因此 anchorX 为 -4。
总结
为什么是 -4 而不是 -4.5?因为,如您在图中所见,所需的锚点位于圆圈左侧边缘外 400 像素处,并且由于 0 表示圆圈的左边缘,因此延伸到圆圈中心(50 像素)的蓝线部分可以忽略不计。